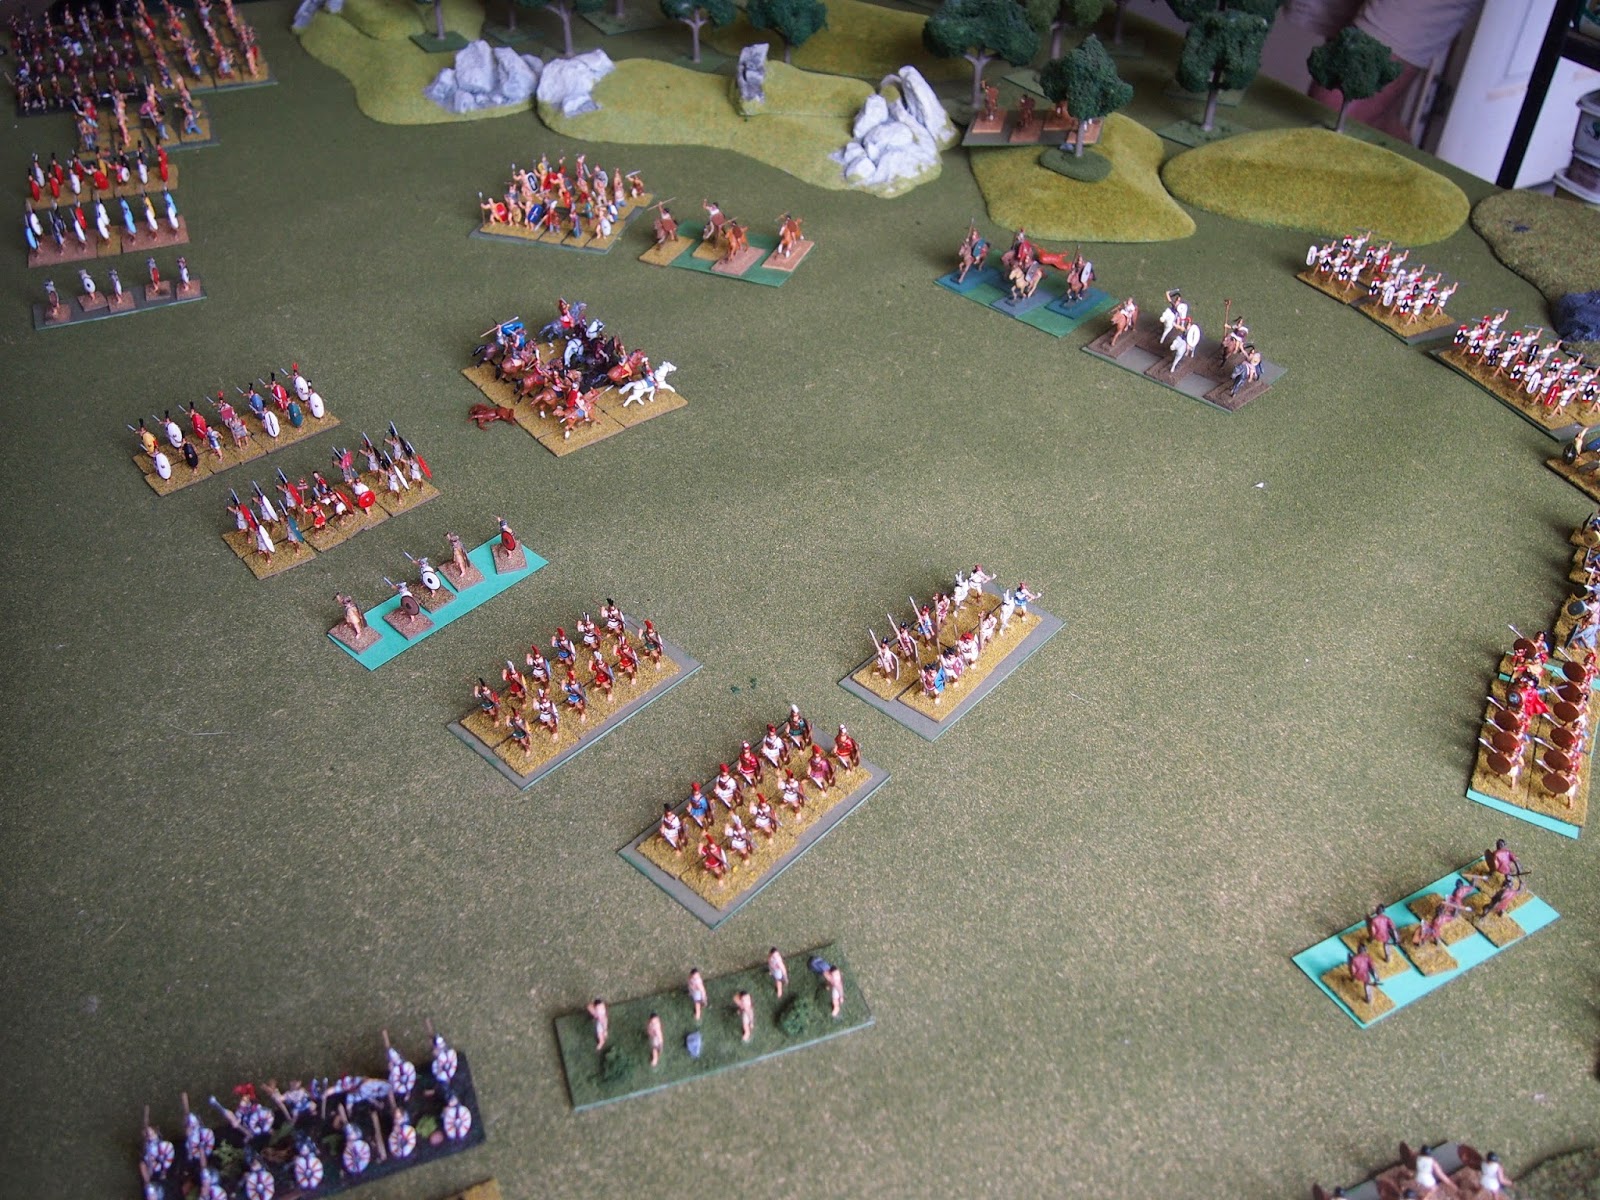
We were joined by Stephen on Sunday for our re-fight of the Battle of Lake Trasimene, his first game with us since La Rothière back in February-March. This was the next game in our selected refights of ancient battles using Impetus and was Stephen’s and Julian’s first game with the rules.
Lake Trasimene is arguably the best example of Hannibal’s strategic genius at work. Such was the manner in which he provoked Consul Flaminius, selected the ground and arrayed his army that the battle was over before it began.
Thus, the Romans in our game, Julian and I, were never expected to win and had the relatively easy task of trying to do better than our historical counterparts. The Carthaginian players on the other hand, Mark and Stephen, had all the pressure. Anything less than a smashing victory would surely be an under-achievement?!
One of our official historians, Polybius, takes up the story:
Meanwhile Hannibal continued as before and marched through Tuscany towards Rome with the city of Cortona and its surrounding mountains to his left and Lake Trasimene on his right. As he marched he continued to devastate the countryside with fire and sword, with the deliberate intention of provoking his opponents to battle. He now saw that Flaminius was already getting close. As he had identified a position ideally suited to his plans, he made ready for battle.
His [Flaminius] route lay through a narrow pass where the terrain was level. Along the length of it on both sides there was a continuous line of high hills, but straight ahead across the front there was another hill, very steep and hard to climb, while the lake beyond and behind it allowed only a very limited passageway between the side of the hill and the lake.
Hannibal marched along the side of the lake and through the pass, and then personally led the occupation of the hill in front, on which he set up camp with his Spanish and Libyan soldiers. He then sent his Balearic slingers and spearmen round to front and stationed them to his right on the lower slopes of the hills that lay along the line of pass.


Polybius continues:
The bulk of the Roman column was now well inside the pass and their vanguard was already in contact with his troops, so Hannibal immediately gave the pre-arranged signal for attack and sent similar orders by runner to those hiding in ambush. They all launched a concerted attack on the Roman line from every side.


As a result most of them were cut to pieces while still in their marching formations and unable to support one another, betrayed, in effect by their general’s incompetence. So they were annihilated before they even realised what was happening, and while they were still wondering how they should react. […] …those who had been trapped between the lake and the steep hillside perished somewhat less honourably and certainly much more wretchedly, for they were driven into the lake.


Our second ANF historian, Livy, takes up the story:
In the universal panic, the consul displayed all the coolness that could be expected under the circumstances. The ranks were broken by each man turning towards the discordant shouts; he re-formed them as well as time and place allowed, and wherever he could be seen or heard, he encouraged his men and bade them stand and fight. "It is not by prayers or entreaties to the gods that you must make your way out," he said, "but by your strength and your courage. It is the sword that cuts a path through the middle of the enemy, and where there is less fear there is generally less danger.”


At last, when ineffective charges had been made in every direction and they found themselves completely hemmed in, by the lake and the hills on either side, and by the enemy in front and rear, it became clear to every man that his only hope of safety lay in his own right hand and his sword. Then each began to depend upon himself for guidance and encouragement, and the fighting began afresh…

Polybius:
Some 6000 of those trapped in the pass had managed to defeat the troops confronting them. But they could not bring support to their own men, nor could they work their way round behind the enemy lines to launch an attack, since they could not see what was happening. Had they been able to do so, they might have provided valuable support to the rest of their army. Instead they pressed steadily forward, advancing in the conviction that sooner or later they would come across further enemy positions. In the end they broke through to the high ground unchallenged.


Once they reached the summit of the ridge, as the fog began to disperse, they became aware of the scale of the disaster. But there was nothing they could now do because the enemy had already achieved a total victory over the whole army and were in complete control of the battlefield. So they wheeled about and retreated to one of the nearby Tuscan villages.


When the battle was over, Maharbal was sent with the Spanish troops and the spearmen to lay siege to the village. The situation for the Romans was hopeless, whichever way they looked at it. So they laid down their weapons and having made a truce surrendered, on condition that their lives were spared. […] The soldiers who had surrendered under the terms of the truce were brought to Hannibal, who assembled them together, along with all the other prisoners, numbering over 15,000 in total.
He began by announcing that Maharbal had no right to grant safe conduct to those who had surrendered on terms without his authority, and then delivered a scathing denunciation of the Romans generally. When he had finished, he handed over the Roman prisoners to his various regiments to be kept under guard, but released the allied troops without ransom and sent them all home. declaring, as he had on previous occasions, that he had not come to make war on the Italians but to fight for their freedom against the Romans.
Livy describes this more colourfully:
Maharbal pursued them through the night with the whole of his mounted force, and on the morrow, as starvation, in addition to all their other miseries, was threatening them, they surrendered to Maharbal, on condition of being allowed to depart with one garment apiece. This promise was kept with Punic faith by Hannibal, and he threw them all into chains.
Hannibal dismissed without ransom those prisoners who belonged to the allies and threw the Romans into chains. He then gave orders for the bodies of his own men to be picked out from the heaps of slain and buried; careful search was also made for the body of Flaminius that it might receive honourable interment but it was not found.
The game lasted merely two turns, but each played out in a leisurely manner and was full of action, so occupied over an hour (each). There had been some glimmer of hope that we might achieve a slightly better outcome than the Romans did historically, but in the end it was a smashing Carthaginian victory.
Another historical battle successfully completed with Impetus, we decided to have a second go using Wargames Research Group 7th Edition, for posterity and to see the difference.

One turn was sufficient to reach a unanimous decision. The mechanics of 7th Edition mean that the action developed in a more step-wise manner and that intervening steps were more clearly defined (as opposed to Impetus where the actions of each unit or group selected for action are played out in full before moving to the next), but even a straight-forward game like Lake Trasimene was clearly going to take us at least four to eight times the time to complete.


The rules are by no means obnoxious (as we all consider DBM to be), but wargames rules and our aims in wargaming have moved on since the late 80s–early 90s (e.g. staging games based on large historical actions, or playing large-scale semi-historical campaigns). We could ‘wheel’ them out again if we wanted to play out a small game in more detail, but I somewhat doubt it…


