Friday 30 March 2018

It's what the Royal Marines are for!

As readers of previous posts on this blog may recall, I have been on a personal journey to try to find a set of Napoleonic naval rules that will work as an equivalent to Shako for land rules. The ANF wants to be able to stage a major naval encounter with dozens of ships a side over a weekend, with realistic results but without endless calculations slowing down play, whether for complex sailing manoeuvres or firing. Efforts in the past to use Signal Close Action, Form Line of Battle and Heart of Oak did not meet favour either with my colleagues, or indeed really with me. After extensive searching and reading up on rules, I decided to try this set. 

I have used other rule sets from A&A Game Engineering in the past, and on first testing them out myself, I was optimistic. But how would they work in a multiplayer game?


We decided to try them out with the simplest possible encounter, two ships a side. For the British, I picked a 'long-74', HMS Invincible, and an old '74, HMS Bellerophon, whilst for the French, the new  issue '80 Bucentaure got a first outing, along with the elegant '74, Commerce de Bordeaux. To make matters simple for this first test of the rules, all crew and command levels were set to 'average' and the wind direction, here coming from the starboard beam of the French squadron, was fixed for the encounter. It was good to see that all could be varied, however, in a simple and intuitive way.


The two squadrons approach one another; French nearest, Bucentaure leading. The shot doesn't show the nicely moulded difference between the '80 and the '74. I am a great fan of the Sails of Glory ships from Ares (though not the rules). 


Ten minutes (one move) later. The French may have been aiming to cross the British 'T', but they underestimated the tactical flexibility of their foe, which split and fired a broadside from both ships into the Bucentaure. First blood to the British. Both firing and damage recording was sorted in minutes: each ship has a gunnery, speed, hull and crew rating which are adversely affected by enemy fire - and that's it. 


Of course the French reply, with significant damage being inflicted on HMS Invincible. In this small encounter, each ship was finding its own opponent.  


The rules have three ranges: normal, short and point-blank, which operate as modifiers to fire factors, exactly as one would expect. Within a short space of time the fight was within short range, and the chance of damage was being increased. 


Initiative in the rules is a simple die roll, then alternating player squadron by squadron, but with only one squadron, the effect can be that one side gets to fire twice without the other side being able to respond. This is what happened, as the French were able to get Bucentaure into a position to stern rake HMS Invincible. The rules are not meant for just one squadron: for small actions the solution is probably simply to make each ship a squadron, which in this action would reduce the chance of this eventuality to 1/16 as opposed to 1/2, or to revert to simple alternate movement.


The British then took the opportunity to close to broadside - easy enough, as the wind is coming from the left-hand side of the pictures. The sailing rules allow for a 'dead zone' through which a tack is required, for turning, acceleration, maximum speeds (which requires a little juggling when ships move through several maximum speeds in a single move, but it is not difficult to organise) - but above all, they are simple to use.


Now the tables were turned, with the British getting two moved, and Bucentaure started to feel the heat, being raked in its turn as well as fired upon on the broadside.


This part of the action has been immortalised in print see Donald Macleod Maritime Art)

The decision was made to try a boarding action, partly because the Bucentaure was down to one hull point (as was HMS Invincible) but also to try out the boarding rules.

But all did not go to plan. The French attempt to board was repulsed, whilst the British commander decided on a counter-boarding action. After four hard-fought melees (all of which the rules say take place in one turn of 10 minutes - I am researching whether this is plausible or whether we should have only 2 melee rolls per move), the French capitulated, with the Union Flag being raised on the deck of the Bucentaure. Well, said our allegedly land-lubber British commander, it's what the Royal Marines are for.


The action came to a natural end at this point. The Commerce de Bordeaux is out of this shot, making away and out of range of the British. 

All parties expressed themselves pleased with the rules, and confident that the couple of hours we spent on this action strongly indicated that they would work well for a large fleet action, exactly as the authors intended. The simplicity of the mechanics did not detract from the logic or the enjoyment of the action - far from it, both players understood them quickly, and were able to concentrate on decisions, on fighting the battle itself. 

For myself, I believe my long and at times depressing, not to say embarrassing, quest for the ideal set of Napoleonic naval rules for the ANF is now finally over. Many thanks to my colleagues for putting up with it - and to James for the pictures for this blog post. We can now look forward to a major naval action with some confidence at last.


Saturday 24 March 2018

Battle of Wavre, 18th June 1815

Mark and I played this game of Wavre back on 25th November 2017, using the Fields of Glory scenario.


Julian has a scenario that he calls 'Pont du bois' which he likes to use as a test of rules. We played out the scenario as a nostalgic game of the Quarrie rules in one of our early games. That left us thinking of 'Pont du bois' as a tough scenario, then we played Wavre. It's Pont du bois 'on steroids'...!


The scenario begins with Vandamme's (whom we always attribute with JCvD, of course!) divisions of III Corps facing the Prussians of Luck and Kamphen who are well-ensconced in Wavre, loop-holes and all, on the other side of the unfordable River Dyle. Dominique (to his friends, but certainly not Czar Alexander) is supported by Excelmans' dragoons while Hulot's 14th division of IV Corps faces off Schulpnagel's Prussians in Bierge and Teste's 21st division of VI Corps is opposed by a small detachment under Stengel.


Map of the tabletop from Fields of Glory (above) and view across the table looking east towards Wavre in the distance (below).


As required by the scenario, Vandamme immediately attacked Wavre.


A bucket-load of luck is required if such attacks, made by only one 'unit' against troops in defensive positions, are to succeed.


Over on the western flank, there was a heap of luck for the French, as Teste's testie boys triumphed in the test of wills, driving off Stengel's men to cross the Dyle.
(Such was my excitement that I focussed the camera on the town of Limal rather than the troops!)

Schulpnagel's Prussians in Bierge as yet unaware of a potential threat to their right flank.


The futile attacks on Wavre continued. JCvD is getting frustrated!


For Teste it seems to be just a quiet summer's day spent crossing the bridge.


Grouchy sent Berthezene's division of III Corps to attack Bierge.


Sending in more good after bad in Wavre.


The 6e hussars take up position on Teste's left flank. Hmmm, what's that in the distance?

Ah, 'tis Hobe's Silesian hussars come to spoil the summer picnic.


The first attack on Bierge was driven back by Prussian musketry.


Troops on Habert's right flank look on, helpless, while waiting their turn in the Wavre mincer.


Hobe's men did indeed spoil Teste's ideas for a quick victory. The 6e will never live down their dishonour.


The Prussian hussars rallied back to recover, putting their uhlan mates in the front line.
"En carré!"


Things were going really badly for Vandamme's men. Not only could they not break into Wavre, the Prussians had audaciously crossed the river to the (previous) 'French sector'!


Berthezene got his troops better organised before Bierge.


Back on the French left, Teste's squares had seen off the uhlans, so the infantry resumed their advance; cautiously with the Silesian hussars still about.


The hussars in turn charged, but Teste's infantry formed square and saw them off too.


Thielmann jumped in his balloon to survey the battlefield. Looking over Wavre, he liked what he saw. Prussians in complete control.

Dropping in over the Dyle, it seemed all peace & calm.

Flying west, it was not looking so good. The French had taken Bierge.


Then over on the right it was 'bad news Prussians'. Teste's testing had developed into a full-blown flank attack, now supported by Pecheux.


So, turn 12 and end of scenario reached, it was time for the Prussians to retire from the board.

The game had largely followed the history. The 
French took Limal and slowly outflanked the Prussian right, aided by a last turn capture of Brieges, but the Prussians remained firmly ensconced in Wavre.
Result: a 'limited victory' to the French.

Another fine scenario from the Fields of Glory scenario book. It had been great to get back into Napoleonics after a lay-off of 18 months (since Friedland in July 2016!).

Wednesday 21 March 2018

A bit of Greek on Greek

Well, Macedon v Greek to be precise.

Mark and I were joined by John from the Serpentine Wargames Club for this, our most recent game, which we played on 10th March.

This semi-historical battle was a mish-mash with armies roughly based on Chaeronea (338 BC) and terrain roughly based on Pydna (168 BC)!


As a 'new-boy' to the Impetus rules, John joined Mark as the Greeks while I got to command Phillip II's Macedonians. History was on my side, which is often a problem...


Overview from Macedonian side
Panning the Macedonian forces. Mark has built up that phalanx (comprised of Hat figures, for those interested) just this year!
The Greeks: Athenians closest to camera, Thebans on their right.


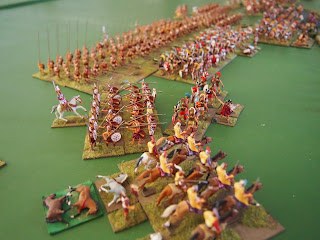
As at Pydna, the battle began with an un-planned 'exchange' amongst the skirmishers near the creek.


In this case the Thebans got by far the better of the combat—beginner's luck for John.
Ever the comedian, he quipped "I thought all this stuff on the blog about your bad luck was just you whingeing James, but I see it is true!"


Meanwhile, the phalanxes advanced...


...as the Thebans cleaned up the last of the Thracian javelin men


(Cue that 'wrragh' sound from Rome Total War!)


On the other flank it was the turn of the cavalry. One unit of Hetaroi chased off the pesky Greek light cavalry, copping many casualties from the flying darts in the process, while the other and their Agema colleagues took on the Greek medium cavalry.


Leaving the Hetaroi to take care of the Greek cavalry, the Agema drove on to attack the left flank of the Greek phalanx, which resisted the charge (i.e. drawn mêlée).


A damned fine sight. In these games you gotta take time to 'smell the roses'. Well done Wilko on all that painting!


Having cleared off the Thracians, the Theban lights and skirmishers begin eying off the Thessalian cavalry.


Huh-rumphh!!
Such a fine sight.


The Agema cavalry (top right) have still not been able to break that resistant unit of hoplites.


Back on the Macedonian left flank, the Thessalian's face off big mobs of blokes with pointed sticks.


A clear message from the gods. Phillip is officially a genius (a double six for the initiative roll in Impetus results in the commander's command value going up one level).


Inspired, he leads his bodyguard infantry to join the Agema's flank attack.


At the other end, the hoplites try a flank attack of their own.


Meanwhile, the battle of the phalanxes grinds on.


It was very much in the balance, but then along came turn 7.


Finally, the Macedonian élite troops disposed of those hoplite heroes on the left of the Athenian phalanx....


but, the phalangites in the centre broke like stalactites losing combat after combat, and unit after unit.

Eventually, the survivors, looking around, blew the retreat...

A clear Greek victory. The Macedonians lost 33 points of demoralisation (VD in Impetus), to the Greeks a mere 13!

'Twas great to have John join us for what we hope will be the first of many occasions. Thanks to Wilko for providing figures, terrain and venue.

Thanks to Dadi and Piombo for the sh!t rules that made me lose; nothing to do with any of my tactical decisions!