Monday 26 June 2017

Race for the bridge: Action at Pretzsch, 29 October 1759

This is the first of several reports about games that we played at the end of 2016 and earlier this year.

The Action at Pretzsch is a little-known rearguard action involving an Austrian retreat (how unusual for this period?) under strong pressure from advancing Prussians. A brief summary from the excellent Kronoskaf website Project SYW  describes the action thus;
"On October 29 in the morning, Arenberg quitted his positions to march to Wittenberg. When the Prussians heard of his departure, Finck marched immediately to follow Arenberg's Corps. When Wunsch reached Gemmingen's post at the defile of Merckwitz (unidentified location), Arenberg retired precipitously on Düben through the forest of Torgau, closely followed by Gemmingen. The latter sent Colonel Haller at the head of his vanguard (2 000 men) on the heights of the Sackwitz wood to cover his retreat. Haller's detachment had not yet reached the summit when Jung Platen Dragoons along with Prussian hussars appeared on the crest. The Prussian cavalry immediately charged the Austrian grenadiers and drove them back, capturing Gemmingen along with 1 400 men. Wunsch and Rebentisch then encamped at Meuro."
Our game of this action, based on the scenario in Charles S. Grant's Refighting History Volume 1, involved General Gemmingen trying to extract his troops from heights behind Sackwitz and across a bridge at Reinharz with Wunsch's Prussians hard on his heels.


We played the game twice. The first game, using Age of Reason rules, involved Mark as the Prussians with Julian (and then me) taking the Austrians. The second, with our Seven Year's War rules based on Zimmermann, with Mark again as the Prussians and me as the Austrians.

This is a combined report of both games.


Version 1, Age of Reason

As I came in late, the report of the first version is somewhat abbreviated.


When I took over the Austrians, they had made good headway to the bridge, with Prussians close at their heels.


I sent the Serbollini cuirassiers and Jung Modena dragoons (heavily disguised as Saxe-Gotha) to drive the Prussian hussars away from the Austrian left. This was greatly successful, capturing the Prussian brigade commander in the process!


As Gemmingen's men fought for their lives, Arenberg's column proceeded to retreat unmolested.


With only a few units safely over the bridge, accumulated losses meant that the Austrians failed their 'army' withdrawal test and would retreat.

Game 1 over. Prussian victory.
Version 2, Zimmermann


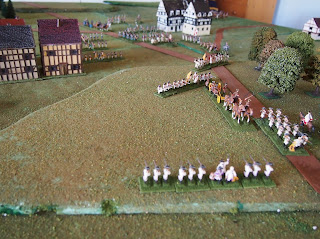
We re-set the table to the original starting positions. Sackwitz can be seen in the distance, with the heights this side of the town. The bridge is in the left foreground. Gemmingen's Austrians are deployed in and around Sackwitz with the heights at their back. The Prussians are coming on from the far table edge. Arenberg's column can be seen at the right of the photo.
This time we began with some aggressive cavalry action, the Austrian dragoons and cuirassiers again seeing off the Prussian hussars, bloodied but not beaten.


As the Prussian infantry advance, the Austrians 'head for the hills', leaving sacrificial grenadiers to protect their rear.


Early on it was looking good for the Austrians (apart from the last grenadier battalion). "This is gonna be a walk in the park, I thought!"


Arenberg's lead battalions neared the table edge and exited to safety.


On my left the Austrian cavalry were conducting a model withdrawal?


Gemmingen's first infantry unit safely over the bridge. "This is *easy*, I thought."

Wunsch's Prussians had other ideas, easily overwhelming the 'forlorn hope' and rushing towards the rear of the retreating Austrians.


Still looking good with nearly three units over the bridge and one about to exit to safety.


Time for the cavalry to join them, I thought.

Looks like another unit of grenadiers will have to be lost for the greater good!


The foolishness of my version of the 'Julian manoeuvre' was now made glaringly apparent to me as the lead, fresh unit of Prussian hussars took the Jung Modena dragoons in the rear, driving them headlong towards the bridge, bringing chaos and confusion!


Still blissfully ignorant of this (or not caring) Arenberg's last units make their safe exit.


The Jung Modena dragoons have reformed, as have the Serbollini cuirassiers at top left (now much reduced in numbers). The rear units of Austrian infantry joining them as an ad hoc rearguard.


The Prussians have reached the edge of the heights, more Prussian cavalry are coming down the right of the woods.


The Jung Modena dragoons selflessly sacrificed themselves to enable the guns to get over the bridge and away.


The escapees: Gemmidgen's much reduced force.

The Austrians had been a bit more successful in extracting troops the second time around, but lost all the cavalry and grenadiers in the process!

Game 2 over. Prussian minor victory due to those significant losses which were similar to the historical version (without the loss of Gemmingen).


This was a fantastic scenario. As the Austrian player I initially thought it was going well and easily, but the Prussians soon caught up and there was pressure galore to try to extricate troops while putting up a delaying defence.

Plenty of pressure for the Prussians too, trying to rush headlong at the Austrians while maintaining a viable attack formation.

An excellent scenario. Thanks Charles! Thanks Mark for providing such wonderful figures to fight it with and to Julian for the venue (ANF-HQ)!

Sunday 25 June 2017

Battle of Bagradas River (Tunis) 255 BC

The Battle of Bagradas River, Battle of Tunis or perhaps first Battle of Bagradas River was fought in the First Punic War between a Roman expeditionary force under consul Marcus Atilius Regulus and a Carthaginian army led by the mercenary general Xanthippus of Sparta.

This game was played on 11th June and is the most recent of those that we have played during the period Nov '16–June '17 when I lost my 'urge' to blog. We used Zimmermann's "The Wargamer's Handbook", that old set that I have enjoyed using since Mark introduced them to me a couple of years ago. We have now compiled the rules for ancients into a document and set of tables that we can refer to (both of documents are works 'in progress').


Mark put together the game largely based on the scenario in the Warhammer Ancient Battles supplement Hannibal and the Punic Wars. and with reference to Patrick Waterson's palindromic-titled article Amazed I Am Ere I Made Zama from The Slingshot no. 262 (2009), He also supplied the troops, table (and venue), as he so often does!

I took the bait and played as Roman...

Nah, actually it is good taking the side that was trounced historically as you can only do better, or else it goes according to the 'script', so fair enough. Either way you cannot lose, surely?!!

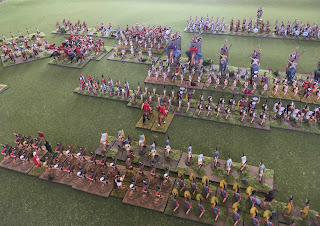
The forces were arrayed on opposite sides of the open plain.


Regulus' 15 000 infantry formed the large centre, deployed in the usual four lines: velites, hastati, principes and triarii with his 500 cavalry split between the flanks.


Xanthippus had 12 000 infantry, 4 000 cavalry and 100 war elephants. He placed the Carthaginian spearmen in the centre, mercenary infantry on the right with light infantry and Carthaginian/Numidian cavalry split between the two flanks. Those 100 war elephants formed the front rank of his centre.


This was according to the historical record (map from Wikimedia Commons).


As were the opening moves: bring on the pachyderms!
Elephants are from Zvezda (left) and Hät (right) War Elephants sets. Velites by Hät.

The velites evaded, leaving the hastati to try to stop the crazy grey beasts.


They passed the panic test, but were no match for the lunging Loxodontini...
(Roman figures mainly from Hät, some from Zvezda at right of photo).


who pursued through to the principes.


 Pachyderm pursuit soon turned to...
mayhem for the Romans!


Regulus sent his cavalry in a 'death or glory' charge in an attempt to break up the Carthaginian attacks on both flanks. On the right, they were at first successful against the Carthaginian cav. (in distance), but pursuing onto the light infantry came unstuck.


Taking stock after the initial shock of the elephants, the Roman line reformed, but would it hold?


The best form of defence is attack! Desperate Roman counter-attacks, but are they merely delaying the inevitable?


Not much sign of the Roman lines in this broad view of the battle.


On the Roman right the triarii have driven back the cavalry and skirmishers-—for now.


The Roman left was under great pressure from a hail of javelins delivered by Numidian cavalry and skirmishers.
(The keen-eyed will notice the Atlantic figures in the foreground amongst those from Hät and Zvezda).


The pressured Roman army looks like a hollow square, assaulted from the left...
centre
and right!


Brief respite. A successful counter-charge by the left-most hastati and principes, drove off Carthaginian cavalry, taking many of their fellows with them.


In the centre though, the Carthaginian phalanx ground forward.

The battle had reached its climax, with what was to be a last turn of desperate mêlées.

Aiming for the triarii to their front (seen just at left of photo), an uncontrolled elephant charge steamed into the rear of the right-most Carthaginian spearmen, sending them to the rear (foreground of photo), before crashing into the spearmen's former opponents on the left of the Roman line!


Successful against their 'revised' foe, they continued towards the messed-up Roman rear; messing it up all over again.


So, what at first seemed to be 'disaster', then turned triumph—combined with the successful attacks of the Carthaginian spearmen—meant that it was curtains for the Romans.


A victory to Carthage, but in this we did not completely follow the history. Our version was far closer with only 20-odd figures difference in 'casualties': 121 v 100.


This was a fast-moving, challenging game. Being Roman, I was always trying to regain order and put ad-hoc formations into some kind of attack formation. As Carthaginian, Mark kept me on the back foot all game, trying to get his troops into contact as fast as possible.

Since changing to Zimmermann for our games of ancients (this was our third game using these rules) I have been far happier with the 'feel' of the games as well as specific mechanics. This was the first time that we have used elephants and those rules seemed to work well, including having them pursue automatically (our addition to the rules) and going 'awry' (as per original rules).