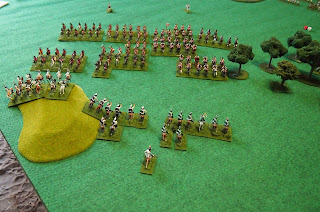
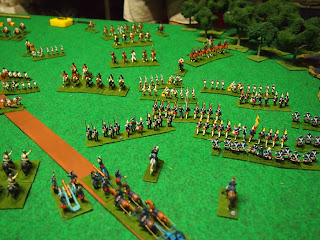
Late last month Mark and I got together once again for a Seven Years’ War game using Zimmermann’s Wargamer’s Handbook.
Apart from the bleeding obvious reason (to play a wargame!) the ‘purpose’ of the day was to put as many as possible of Mark’s painted Seven Year’s War figures onto the table and to test out some edits that he/we’d made to the Zimmermann’s rules. In the past year Mark has been feeding his Seven Year’s War 'bug' and now has sizeable armies, most of which were field on the table that day.
Mark's figures arrayed for placement in starting positions on the tabletop (you can see the few that were not included in the boxes behind).
Looking more closely at the Austro-Saxons.
Prussian infantry in front, Austrian cavalry at rear.
Prussian cavalry, with guns in front, beside Old Fritz himself.
Sides decided, I set up the Prussians (see here at left of photo)...
and Mark the Austro-Saxons (seen here from the opposite end of the table).
Victory points were allocated to each side for the bridge and small town (seen in the photo above from the Prussian side) and the central ridge and large town (seen in the photo from the Austro-Saxon side). Each side's allocation of points was in an envelope, so unknown to the other player.
Both sides advanced.
The Austrian left (top photo) and centre (bottom) seen here more closely.
First blood to the Prussians as some Austrian hussars fall to the heavy artillery.
This could have been a devastating charge against the Austrian left, had it gone in, but instead these 9th dragoons got the shot s.... out of them!
Above and below: on the Austrian right, the large body of cavalry had finally negotiated the stream and was moving towards the Prussians, faced only by a brigade of light cavalry...
...since the Prussian main effort was going against the central hill and Austrian left.
The third and the first hussars were first to meet the Austrian heavies..
... defeated as expected, they retreated, taking the 4th with them, but were all able to rally and continue the fight.
Anything you can do: the Austrian hussars suffer a similar fate at the hands of the 10th cuirassiers.
Meanwhile, the 1st Infantry brigade attempted to take the central hill,
but the Austrians drove them off..
though not without loss themselves.
Back on the Prussian left, it was the turn of the 5th hussars to get a bloody nose...
joining their colleagues in retreat!
The 10th cuirassiers charged the Austrian line, suffering casualties on the way in and breaking in the subsequent mêlée.
In went the grenadiers, easily accounting for an Austrian battery.
On came the Austrian heavy cavalry.
The Prussian light horsemen were being whittled down, but were doing their job in delaying the Austrian cavalry.
Back on the Prussian right, the 2nd Infantry brigade was making progress against the Austrian left, securing the bridge in the process and forming up on the other bank to fire on the flank of the Austrian line.
Now, it was up to the grenadiers to drive in the centre and win the battle for Frederick.
It was now the end of the eighth turn. Both sides had passed two army morale tests at 1/3 figure losses.
The Prussian attack on the left was running out of 'puff',
The Austrian heavies were finally coming around to threaten the Prussian left-rear,
a movement that the Prussian heavy cavalry failed to halt (seen in retreat, centre of photo).
The Saxon infantry, centre-left of photo, had awakened from their slumber and they too were moving towards the Prussian left flank.
A breakthrough was not going to occur this day.
So Frederick signalled a general retirement.
To conclude, a few closer-up photos of some of the units at game's end.
It had been a most enjoyable game and fun to play a traditional, seventies-style game of line 'em up and have a bash. The objectives added an extra bit of interest to the battle.
The further changes/clarification of fire effects, added rules for brigade commanders to rally troops and refining the army morale tests had all worked. We have 24th November ear-marked for an historical battle to test the changes to the rules further—and to introduce Julian to Zimmermann's rules.


Great looking game - that is a lot of figures!
ReplyDeleteThanks for that. More to come in a couple of weeks!
DeleteMassively sized battle. James, do you have a list of changes/amendments with details?
ReplyDeleteThanks Jonathan.
DeleteAll Mark's good doing with the figures and terrain. I merely had to turn up!
I don't have the details to hand, but we are planning to type up the new tables and play sequence on the weekend (all going well). I could email you a copy if you like (send your email address to mine which is on the front of our blog)?
Part of it is merely to take the sections from the various pages of the handbook and have them in one place (with pages in the original referred to). The main changes are that Mark has reduced the effects of artillery and musketry. We also reduced the range of canister. We added a 'command phase' at the beginning of a turn in which you may move commanders and attempt to rally troops (brigade commanders give one level of bonus, army commander more). Part of this is a slight chance of danger to a commander if he finds himself subsequently in a line of fire or in combat. Another thing is a clarification and simplification of the combat effects changing losses from a ratio to be calculated (the ratios being a little tricky in some cases) to a simple look-up table based on number of figures involved. Lastly, we have put in a bit of clarification re. the army morale tests and included deductions for flags captured, objectives held. Perhaps we could add for commander incapacitated too.
So, most of it is merely specifying and clarifying what Zimmermann has as suggested rules.
I hope that makes some sense!
James
Makes perfect sense, James! Incoming email request.
DeleteLooks fantastic James!
ReplyDeleteThanks Rodger, it was an enjoyable sight on the table.
DeleteIt's always great to get all of the toys out and even better if you just "have to turn up and play", sounds perfect to me. I keep being tempted to collect toys for this period which we play using Maurice rules using our Napoleonic models, just maybe I will succumb... just maybe!
ReplyDeleteBest wishes,
Jeremy
Thanks for that Jeremy.
DeleteYeah certainly a treat to merely 'turn up'!
Succumb, succumb, there are no prizes for being stoic in this caper!!! :)
Lovely looking action, James. It may be because so many of us were exposed to the late Peter Young's "CHARGE!" early in our careers, but this era just looks "right" with old school, toy soldier style painting.
ReplyDeleteLike Jeremy, I have been resisting collecting "tricorne" era forces for decades. After all, there is always another obscure Napoleonic unit to paint... isn't there? :-)
Yeah, we know what you mean/agree Peter.
DeleteCan't have too many Napoleonics, of course, but this is not bad as a 'eras other than Napoleonics' go!!